


How to Install Winget on Windows

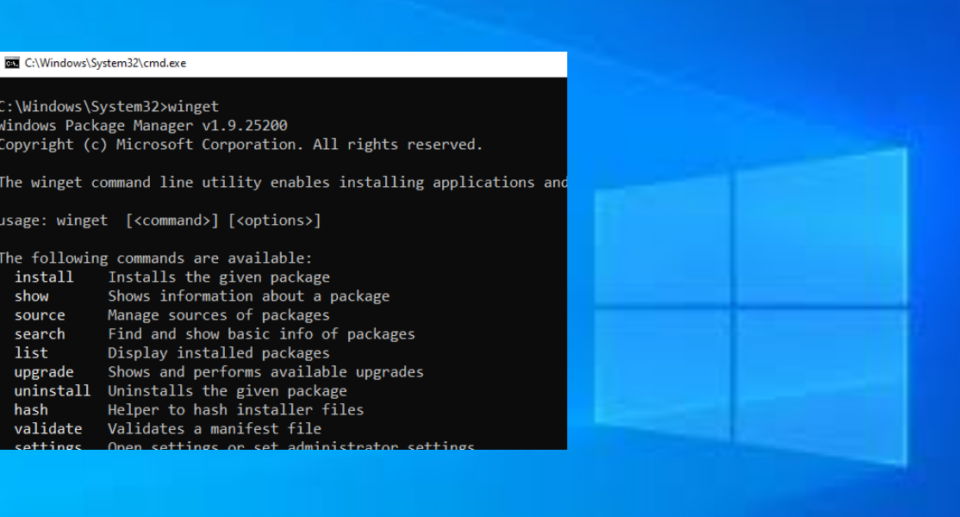
If you’re looking to streamline your software installation process on Windows, you might want to install winget. Winget, or the Windows Package Manager, is a command-line tool that allows users to automate the installation of applications and manage software packages with ease.
In this article, we will guide you through everything you need to know about installing winget, including how to install it on both Windows 10 and Windows 11, using PowerShell, and even from the command line.
Understanding Winget: What Is It?
Winget, the Windows Package Manager, is a powerful tool designed for developers and system administrators alike. Its primary function is to simplify the process of installing, updating, and configuring applications on Windows. With winget, users can easily access a repository of available software and manage their installations from a single interface.
Key Features of Winget
- Command-Line Interface: Offers a straightforward way to manage applications without needing a graphical user interface.
- Bulk Installation: Allows users to install multiple applications simultaneously.
- Easy Updates: Helps keep software up-to-date with minimal effort.
- Extensive Repository: Provides access to a wide range of popular applications and tools.
How to Install Winget on Windows 10
Installing winget on Windows 10 is relatively simple, provided you meet specific requirements. Here’s how you can proceed:
Prerequisites
- Windows 10 version 1809 or higher.
- The App Installer package installed from the Microsoft Store.
Step-by-Step Instructions
- Open Microsoft Store: Search for “App Installer” in the Microsoft Store and install it if it’s not already installed.
- Check Version: Make sure your Windows build is updated to the latest version by navigating to Settings > Update Security > Windows Update.
- Install via Command Line: Open Command Prompt (cmd) and run the following command:winget –version
If winget is installed correctly, you’ll see the version number displayed.
- Complete Installation: If winget is not installed, it will prompt you to download the latest version. Follow the instructions to complete the installation.
How to Install Winget on Windows 11
Installing winget on Windows 11 follows a similar procedure to that of Windows 10. However, Windows 11 comes with winget pre-installed, so installation may not be necessary.
Checking for Winget
- Open the Terminal: Right-click on the Start button and select “Windows Terminal” or search for it in the Start menu.
- Verify Installation: Type the following command:winget –version
If winget is installed, you will see the version number. If not, proceed with the steps below.
Installing Winget Manually
In case you find winget missing:
- Open Microsoft Store: Search for the “App Installer” and ensure it’s installed.
- Update Windows: Ensure your system is up-to-date by navigating to Settings > Windows Update.
- Recheck Winget: Once everything is set, repeat the verification step.
Installing Winget Using PowerShell
PowerShell provides an alternative method to install and manage winget. Here’s how to do it:
Step-by-Step Instructions
- Open PowerShell as Administrator: Right-click on the Start button and select “Windows PowerShell (Admin).”
- Run the Installation Command: Input the following command to install the App Installer:
powershellReplace
C:\path\to\AppInstaller.appxbundlewith the actual path to the downloaded file. - Confirm Installation: After running the command, open a new PowerShell window and check the installation with:winget –version
Installing Winget from Command Line
For those who prefer the command line, here’s how you can install winget using Command Prompt:
Step-by-Step Instructions
- Open Command Prompt as Administrator: Search for “cmd” in the Start menu, right-click, and choose “Run as administrator.”
- Download the App Installer: Use the following command to download the installer:
cmd - Install the App Installer: Run the command:
cmd - Verify Installation: Run the command:winget –version
Troubleshooting Common Installation Issues
Even the most straightforward installations can face issues. Here are some common problems and their solutions:
- Winget Not Found: Ensure that you have Windows 10 version 1809 or higher and that the App Installer is properly installed.
- Network Issues: If downloads are failing, check your internet connection or try switching networks.
- Insufficient Permissions: Always run the installation commands in an elevated Command Prompt or PowerShell.
Comparing Winget with Other Package Managers
| Feature | Winget | Chocolatey | Scoop |
|---|---|---|---|
| Installation Method | Command Line Interface | Command Line Interface | Command Line Interface |
| Repository | Microsoft Store | Community Repository | GitHub |
| GUI Support | No | Yes | No |
| Automatic Updates | Yes | Yes | Limited |
Choosing the best package manager depends on individual needs and preferences. Winget is robust for Windows users, while Chocolatey offers a GUI, making it easier for beginners. Scoop is excellent for development environments due to its simplicity.
Conclusion
In conclusion, installing winget offers a streamlined approach to managing software installations on Windows. Whether you’re using Windows 10 or 11, PowerShell, or the command line, following the outlined steps ensures a smooth installation process. With winget, you’ll benefit from easier updates, bulk installations, and efficient software management directly from your terminal.
By understanding how to effectively install winget, you’re well-equipped to enhance your productivity and simplify your software management tasks. Happy installing!


